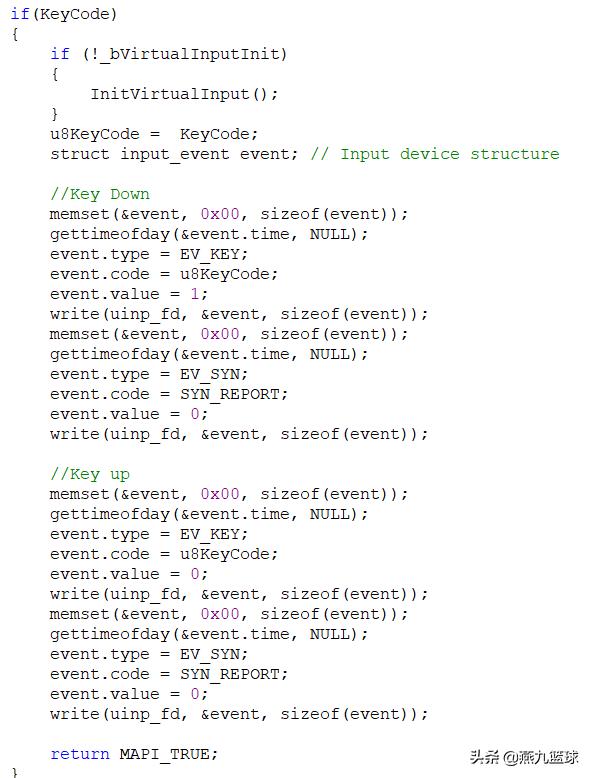
Linux 通过/dev/uinput模拟按键发送Key键值
一、uinput在以下情况下可以给我们带来很大的方便:
【Linux 通过/dev/uinput模拟按键发送Key键值】 1、不需要自己写驱动
2、用户态向/dev/input/eventX写入事件 , 即用户向Kernel注入数据
二、使用UInput的步骤为:1. 打开设备 。
 文章插图
文章插图
打开input device
调用kernel下:static int uinput_open(struct inode *inode, struct file *file) 参数inode对应的是 主设备为10,子设备为223的node(即为用户态的dev) 参数file对应打开的文件 。 动作: 创建了newdev-- uinput_device结构 。newdev->state = UIST_NEW_DEVICE;file->private_data = http://kandian.youth.cn/index/newdev;
2. 使用ioctl() 配置设备 。
 文章插图
文章插图
调用kernel下:static long uinput_ioctl(struct file *file, unsigned int cmd, unsigned long arg) 参数file对应打开的文件 。参数cmd 对应用户态ioctl参数2 。 UI_SET_EVBIT 参数arg对应用户态ioctl参数3 。 EV_KEY动作: 将driver参数传递过来 。udev = file->private_data; udev->dev 是个input_dev 类型数据 。此时 , 它未初始化 。如果udev->dev为空 , 则使用 uinput_allocate_device(udev);申请input_dev结构 CMD=UI_SET_EVBIT uinput_set_bit(arg, evbit, EV_MAX); 首先判断newdev->state为UIST_CREATED , 则返回错误码 。这就说明:设置bit , 需要在create input device 之前 。具体动作为:udev->dev->evbit 设为EV_KEY.注意:此处input device的evbit: 一个是evbit表示设备所支持的动作.: #define EV_KEY 0x01 // 按键 #define EV_REL 0x02 // 释放
其它设置如下: ret = ioctl(fd, UI_SET_RELBIT, REL_X); //鼠标 ret = ioctl(fd, UI_SET_RELBIT, REL_Y); ret = ioctl(fd, UI_SET_EVBIT, EV_ABS); ret = ioctl(fd, UI_SET_ABSBIT, ABS_X); ret = ioctl(fd, UI_SET_ABSBIT, ABS_Y); ret = ioctl(fd, UI_SET_ABSBIT, ABS_PRESSURE);
3. 使用write() 将input device信息设置好 。
 文章插图
文章插图
Device status为UIST_NEW_DEVICE 并将udev->dev 这个input device 具体化 。 初始化该input_dev,之后 , 改变状态: udev->state = UIST_SETUP_COMPLETE;
4. 使用ioctl(UI_DEV_CREATE)创建Input Device 。 (即使用write设置的)
 文章插图
文章插图
调用kernel下:input_register_device(udev->dev); //向子系统注册该设备 , 之后中断时input_event()向子系统报告事件 udev->state = UIST_CREATED;
5. 再使用write() 写入event.
 文章插图
文章插图
调用kernel下:static ssize_t uinput_write(struct file *file, const char __user *buffer, size_t count, loff_t *ppos) 因为此时state为UIST_CREATED input_event(udev->dev, ev.type, ev.code, ev.value); // 发送event.
- 对微前端的11个错误认识
- Linux培训完能到什么水平,之后还需要学习哪些技术?
- 如何使用 lshw 查看 Linux 设备信息
- 国务院通过最新规划,新能源汽车新风口定了
- AMD Radeon图形驱动占到了Linux内核的10.5%
- MakerBot宣布通过尼龙12碳纤维扩大其材料供应范围
- 腾讯游戏开发工程师:Linux 机器 CPU 毛刺问题排查
- 基于Ansible和CodeDeploy的DevOps方案
- Linux 开发过程那么麻烦,是否值得?
- Linux 黑话解释:什么是包管理器?它是如何工作的?
